
Binokula offers several options to structure security around your reports, where you can create user and report groups and define multiple assignment types such as one-to-one, one-to-many and many-to-many. However, if you need to implement a more granular level of security, you can take advantage of Power BI Row Level Security.
Row-level security (RLS) with Binokula and Power BI can be used to restrict data access for given users. This scenario is usually applicable when you have a single report with data from different parties (different customers or suppliers or sales resources), and you want to deploy this single report and allow access to those different parties to view only their data. Filters restrict data access at the row level, and you can define filters within roles. In Power BI service for instance, members of a workspace have access to the datasets in the workspace. RLS doesn’t restrict this data access.
You can configure RLS for data models imported into Power BI and Binokula with Power BI Desktop. You can also configure RLS on datasets that are using DirectQuery, such as SQL Server.
You can define a user role within Power BI Desktop. When you publish to Binokula workspace in Power BI, it also publishes the role definition.
In this scenario, Binokula will use the email address of the logged user to filter and display the data.
For the purpose of this scenario our data table is as follows:

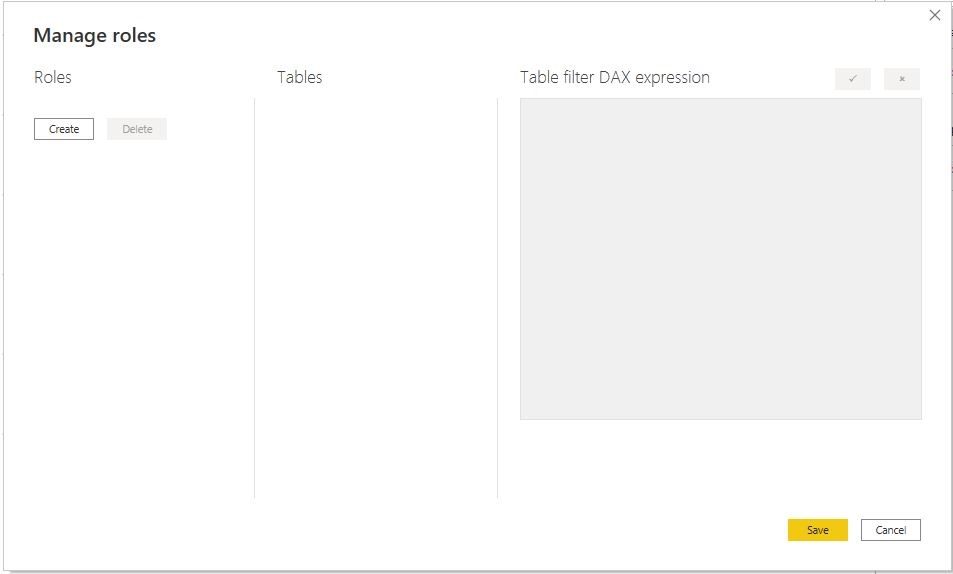
To define security roles, follow these steps.
1. Import data into your Power BI Desktop report or configure a DirectQuery connection.
2. From the Modeling tab, select Manage roles.

3. From the Manage roles window, select Create.
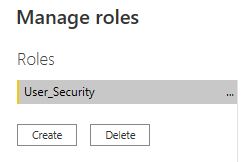
4. Under Roles, enter the name “User_Security” for the role.
5. Under Tables, select the table to which you want to apply a DAX expression.
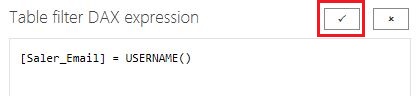
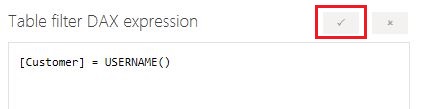
6. In the Table filter DAX expression box, enter the DAX expression [Column Name] = USERNAME().

This expression will return the username of the user logged in Binokula.
7. After you’ve created the DAX expression, select the checkmark above the expression box to validate the expression.
8. Select Save.
From now on every time a user logs to Binokula the report will display data filtered according to the user’s email of that user.
After you’ve created your roles, test the results of the roles within Power BI Desktop.
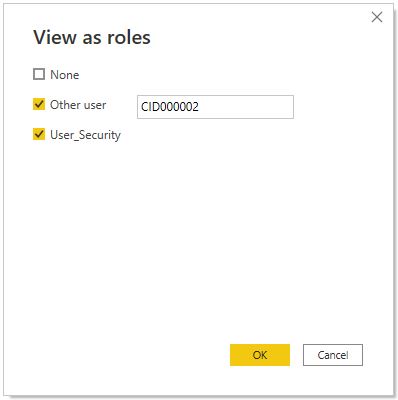
1. From the Modeling tab, select View as.
The View as roles window appears, where you see the roles you’ve created.

2. Select the role Other user along with the role you created (User_Security), enter a user email, then select OK to apply that role.
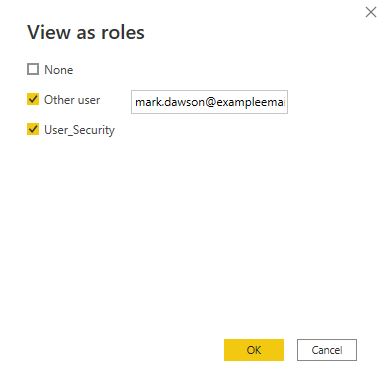
4. Select OK.
The report renders based on the user’s email.
Now that you’re done validating the role in Power BI Desktop, go ahead and publish your report to the Binokula Power BI workspace.
You can define an alias role within Power BI Desktop. When you publish to Binokula workspace in Power BI, it also publishes the role definition.
In this scenario, Binokula will use an alias as the filter parameter. In this example the alias is the customer ID.
To define a security role based on an alias, repeat steps 1 to 4 described on the section “Define user role in Power BI Desktop“.
5. Under Tables, select the table to which you want to apply a DAX expression.
6. In the Table filter DAX expression box, enter the same DAX expression [Column Name] = USERNAME() as before, however, now refer it to the column Customer.

This expression will return through the username function the alias from Binokula (See the section Configure an alias in Binokula to learn how to configure it).
7. After you’ve created the DAX expression, select the checkmark above the expression box to validate the expression.
8. Validate your role following the steps in the section “Validate the user role within Power BI Desktop“, however, at this time use a customer ID instead of the user email.
The report renders based on the customer ID.
Now that you’re done validating the role in Power BI Desktop, go ahead and publish your report to the Binokula Power BI workspace.c
In order to complete the example above you have to define an alias to the user profiles in Binokula.
You can still use the same filter you set up previously, however, in Binokula you can enable the option “Enable RLS Alias”. Using this option Binokula will ignore the user email of the logged user and will apply as a filter whatever string you have entered in the Alias field. In our scenario the alias is a customer ID.
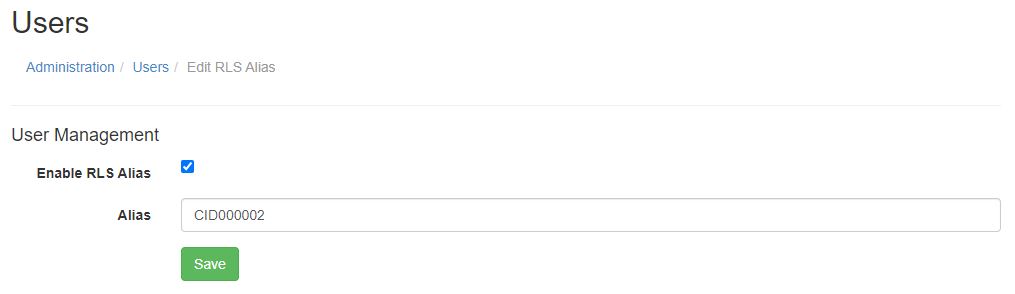
1. Go to Administration and select User Management.
2. Choose a user in the list and select Edit RLS Alias.
3. Click the option Enable RLS Alias.
4. Enter a customer ID, then click SAVE.
Repeat this action and add customer IDs to all users in the list.
5. Go to Administration and select Reports.
6. Click “Enforce Security Role” to the reports you’ve applied the RLS filter.

From now on Binokula is ready to send the alias through the DAX expression to filter data.
This article is recommended for those who want to learn more about Power BI Row-level Security.
If you are having issues to configure a RLS role, do not hesitate to contact us.

Binokula was created by Stellar Consulting Group, an award-winning Microsoft Gold Data Analytics Partner. We are here to help businesses succeed by empowering their affiliate networks with greater knowledge and insight.
As big fans of Power BI, our initial version of Binokula was “Binokula for Power BI” to add important functionality that allows companies to securely share Power BI reports beyond their firewalls with ease. The future for Binokula is to allow the publishing of reports created by other popular reporting toolsets.
© 2025 Stellar Consulting Group Ltd
Subscribe to our newsletter